Product reviewed: Nourished Essentials Easy Fermenter
Even as a small child I loved the salty sourness of sauerkraut and the pucker-power of a good pickle — much to the delight of my sisters, who, according to my mother, thought it was great fun to place sour foods on the tray of my high chair to see if I’d actually eat them (I did). Of course, fermented foods like these are not just tasty, they also are excellent sources of gut-friendly probiotic bacteria.
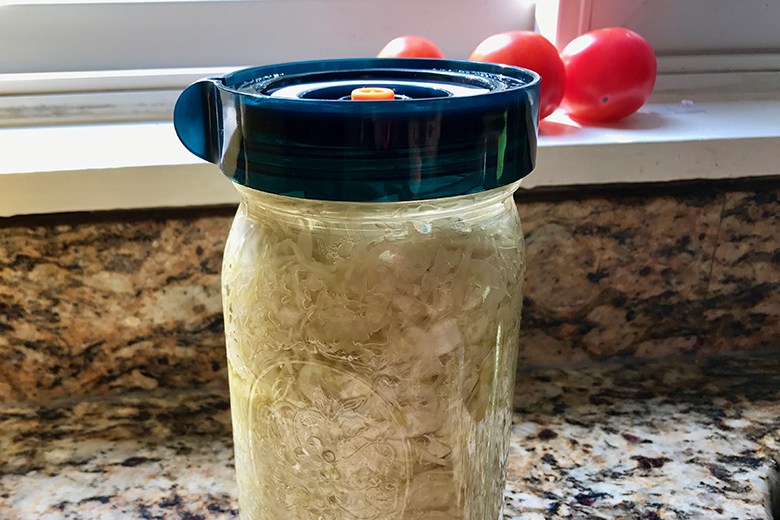
I’ve long wanted to learn how to make my own sauerkraut and pickles, but I can never quite get to the class my local extension program offers periodically, so I was pleased for the opportunity to get my hands on this product. There are several fermentation kits sold online by Nourished Essentials, but the kit I tested was the Easy Fermenter 3-Pack+Pump kit, which consists of three sturdy lids that fit a standard wide-mouth canning jar. The lids are designed with a small valve that allows carbon dioxide created during fermentation to escape, but doesn’t let any oxygen in, thus eliminating the need for more complicated air lock mechanisms that frequently come with fermentation equipment setups.
Also in my kit was a vacuum pump, which looks and functions just like vacuum pumps used to remove air from wine bottles when you want to maintain the quality of wine remaining in the bottle. Removing oxygen from the jar is sometimes necessary during the fermentation process, such as after you’ve taste-tested your ferment. The kit also comes with a short instruction booklet, and purchasers get free access to Nourished Essentials’ “Fermenting Club,” an online forum for recipes, information, instructions and troubleshooting — a useful bonus!
Taking my cue from the instruction booklet and videos on the Easy Fermenter website that described sauerkraut as an easy introduction to the art of fermentation, I thinly shredded some fresh cabbage and got started. I tossed the shredded cabbage and a little Kosher salt in a mixing bowl, let it sit for about an hour, then packed it all into a quart-sized jar, making sure all the cabbage was covered with the liquid produced while the cabbage rested in the bowl. I then screwed on the lid and left it on the counter. That’s basically all there was to it — they weren’t kidding when they said it was easy! The next day I noticed some tiny CO2 bubbles making their way up to the top of the jar, meaning it was working! As it turns out, I packed the jar too full and some of the brine escaped through the valve and collected on the lid, but I just poured it off.
Just over 30 days later, I taste-tested my sauerkraut and it was delicious! And all I had to do next was put the jar in the refrigerator — no need to swap the special lid with anything else — where it will keep for several months. I’m so pleased with the taste of my homemade sauerkraut. It tastes less salty than commercially produced sauerkraut, which is nice because I usually have to rinse sauerkraut due to its saltiness.
Incorporating more fermented foods into my diet is a goal of mine, and having the Easy Fermenter makes home fermentation much less daunting than I thought it was going to be. 
I highly recommend this product, especially because you don’t have to purchase a lot of equipment to get started — most people have a jar on hand at home, and the cost of this kit is reasonable.


